Here’s a good trivia question for you: Do you know your own birthstone? And if you do, are you sure it’s the right one?
Birthstones–precious stones associated with the month of the year when you were born–have been around for generations: many cultures have traditions, legends, and belief systems that incorporate these unique gems.
In the early 2000s, jewelers decided to update the list of modern birthstones to focus on gems that are more readily available. Instead of hefty, opaque selections like pearls and opals, the 2000s-era birthstone chart selects gems that are naturally transparent. This makes it much easier to create birthstone-specific gifts like jewelry and gem-studded decorations, but it also makes it easier to find lower-cost alternatives for expensive birthstones within the same color family.
Today, we’re exploring the opportunities found in rhinestones. Studious DIY-ers can make budget-friendly swaps for their loved ones’ birthstones with these rhinestone equivalents. Find your favorite shades, select flatback or hot fix, and you’re off to the races in style!
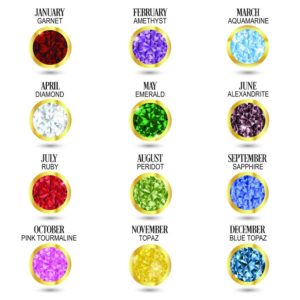
 January
Birthstone: Garnet
What it Looks Like: Garnet is a gem that usually appears in a dark shade of red, but can be found in a variety of colors. Traditionally, garnets are found in Brazil, India, Madagascar, and the United States, and form isometric crystals that can be easily cut and shaped into rich red pieces.
Best Bang for your Buck: Brilliance Siam Rhinestones or Dome Rhinestone Beaded Buttons
One Step Up: Swarovski Burgundy Rhinestones
Inspiration Credit: Amy Holton Designs
 February
Birthstone: Amethyst
What it Looks Like: This lovely purple gemstone is usually found in a lighter shades, but can range from close-to-clear to deep, dark purple. As a naturally forming crystal, amethyst creates some beautiful, intricate shapes. For a rhinestone equivalent, choose from a range of purple shades.
Best Bang for your Buck: Brilliance Amethyst Rhinestones
One Step Up: Swarovski Amethyst or Purple Velvet Rhinestones
Inspiration Credit: DesignLoveFest
 March
March
Birthstone: Aquamarine (replacing Bloodstone)
What it Looks Like: Aquamarine, as its name suggests, offers a beautiful collection of blue shades. Usually found as a bright, cheery blue (as opposed to the darker, deeper shades you’d find in sapphire), aquamarine is a great pick for beachy DIY projects, spring-themed jewelry, and rhinestone embellishments.
Best Bang for your Buck: Brilliance Aquamarine Rhinestones
One Step Up: Swarovski Aquamarine or Caribbean Blue Rhinestones
Inspiration Credit: Creative in Chicago
 April
April
Birthstone: Diamond
What it Looks Like: You know what they say–diamonds are a girl’s best friend! However, this beautiful stone is so sought-after that it’s become famous for its price. Diamonds run the gamut from traditional, clear-cut stones to darker shades, rough-cut “natural” diamonds, and even pink diamonds! For a lower-cost alternative, try clear glass beads or rhinestones in your favorite shimmery shade.
Best Bang for your Buck: Brilliance Collection Crystal Rhinestones
One Step Up: Swarovski Crystal or Crystal Silver Shade Rhinestones
Inspiration Credit: Blitsy
 May
May
Birthstone: Emerald
What it Looks Like: Who doesn’t love the gorgeous green of emeralds? These beautiful stones can be on the lighter or darker ends, all with rich greens that can even look blue or clear in certain lights. Emerald is a great pick for summery projects and jewelry. Choose rhinestones with a deep green hue to match the extravagance of emerald more closely!
Best Bang for your Buck: Brilliance Emerald Rhinestones
One Step Up: Swarovski Emerald or Swarovski Palace Green Opal Rhinestones
Inspiration Credit: Cut Out And Keep
 June
June
Birthstone: Alexandrite (replacing Pearl)
What it Looks Like: Traditionally, June’s birthstone was pearl, but those can be tricky to get ahold of–and trickier still to add to DIY projects. Instead, alexandrite offers a stone with a similar sheen that’s much easier to get your hands on. For a less expensive option, try an opalescent rhinestone or one that isn’t transparent.
Best Bang for your Buck: Brilliance Crystal Ab Rhinestones
One Step Up: Swarovski White Opal or Transmission Rhinestones
Inspiration Credit: Sydne Style
 July
July
Birthstone: Ruby
What it Looks Like: Rubies are one of the most interesting gemstones available. Their deep red color is prized for its intensity, and makes a great addition to any summery projects, embellishments like flames and phoenixes, and rhinestone sunsets.
Best Bang for your Buck: Brilliance Light Siam Rhinestones
One Step Up: Swarovski Ruby or Siam Rhinestones
Inspiration Credit: The Pinning Mama
 August
Birthstone: Peridot or Spinel (replacing Sardonyx)
What it Looks Like: Peridot looks like a gentler emerald, with a soft green hue. This shining stone is great for understated pieces, and makes a wonderful counterpart to silver, gold, or rose gold for that effortless springtime look.
Best Bang for your Buck: Brilliance Peridot Rhinestones
One Step Up: Swarovski Peridot or Chrysolite Rhinestones
Inspiration Credit: All Free Jewelry Making
 September
Birthstone: Sapphire
What it Looks Like: Sapphire will catch anyone’s eye. This gorgeous blue stone can be as bright as a summer sky or as mild as water. The many shades available make sapphire a popular choice for earrings and bracelets, especially when laid against silver, black, or gold.
Best Bang for your Buck: Brilliance Sapphire and Light Sapphire Rhinestones
One Step Up: Swarovski Sapphire and White Opal/Sky Blue
Inspiration Credit: Honestly WTF
 October
Birthstone: Tourmaline (replacing Opal)
What it Looks Like: Tourmaline is one of those incredible stones that can be different every time you pick it up. Many October babies choose a specific variation–pink tourmaline–as their gem of choice because of its brightness and flair, but tourmaline can appear in shades of pink, red, and dark hues that approach black.
Best Bang for your Buck: For pink tourmaline, try Brilliance Rose Rhinestones
One Step Up: Swarovski Crystal Volcano or Fuchsia Rhinestones
Inspiration Credit: Susan McDonough
 November
Birthstone: Topaz or Citrine
What it Looks Like: Topaz and Citrine are known for their gentle, orange hue. This stone lets off a comforting glow, like sunlight trapped in glass. These stones are great for jewelry you’d wear in summer and fall, or any DIY projects that are designed to catch the light.
Best Bang for your Buck: Brilliance Topaz Rhinestones
One Step Up: Swarovski Crystal Tabac
Inspiration Credit: Woman’s Day
 December
Birthstone: Blue Zircon or Tanzanite (replacing Turquoise or Lapis)
What it Looks Like: We know the color turquoise because of the stone it’s named for–a flawless, deep blue that’s almost green. In recent years, it’s become much harder to find turquoise appearing naturally, so blue zircon and tanzanite make great substitutes. You get all the beauty of turquoise’s natural shade with a stone that’s much easier to place.
Best Bang for your Buck: Brilliance Blue Zircon Rhinestones
One Step Up: Swarovski Blue Zircon or Crystal Meridian Blue Rhinestones
Inspiration Credit: Rosyscription


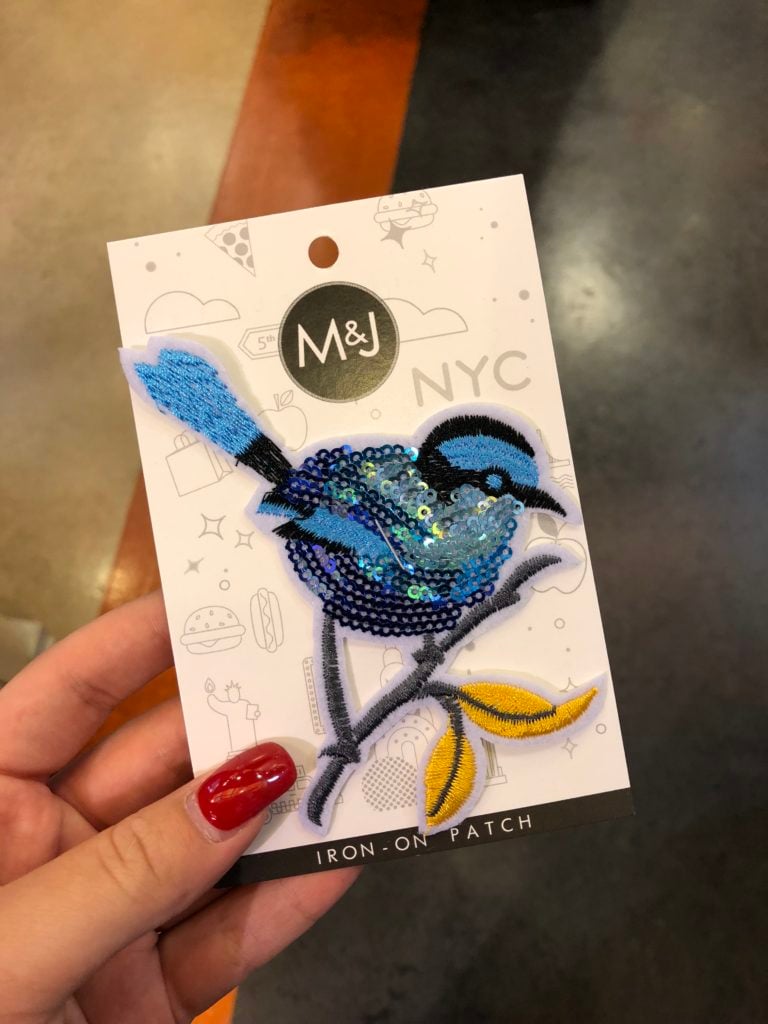


 1: Add some glue to the back of the applique, making sure you get all the edges.